Resin is both a new and an old material. It has been with us for years, but it became popular only recently. Eventually, I packed up some courage and decided to try resin myself. As per usual, I did extensive research to find the best of the best as it’s always a part of the success. My choice fell on ArtResin, and I’m going to review it in this post.
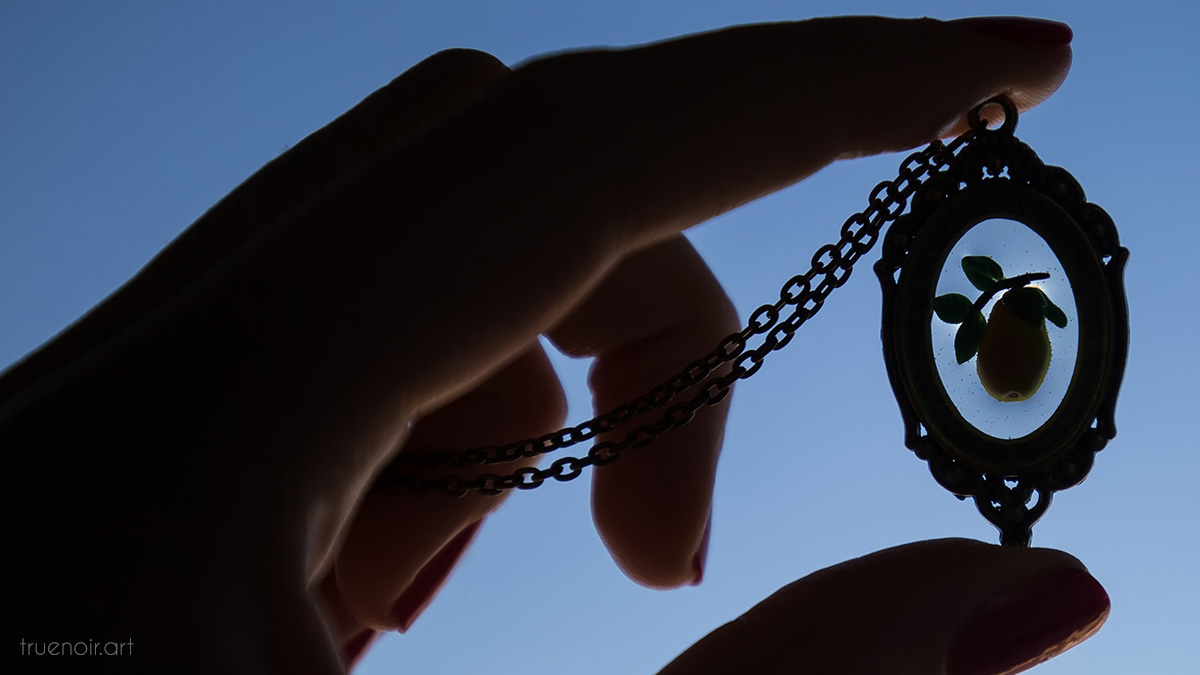
I had certain projects in mind, but at the time I was fascinated with jewelry. I decided to try out this resin on the “Floating Fruits” jewelry series. The idea was to create pendants with seemingly floating in midair fruits. I sculpted some miniature fruits out of polymer clay; of course, there had to be my favorite pears! Then, I used a metal pendant frame which I taped on the back with transparent tape, and mixed some ArtResin. I must say, making a quality product is only half of the success. ArtResin folks actually have extensive learning materials and guides on their website and YouTube channel, which for sure contributed to my choosing of this brand.
I followed all resin mixing recommendations, including safety precautions, such as using nitrile gloves, measuring the resin and hardener carefully, and timing myself while stirring correctly. These are basically your main steps for a successful cast. I haven’t used resin before, but I imagined there might be an unpleased chemical smell. ArtResin has a certain smell, but it’s more like soap or shampoo, not intrusive at all. However, you have to use it in a well ventilated room per the instructions.
Mixing resin might sound like a trivial thing, but it turns out that one has to stir slowly for full three minutes in order to minimize bubble formation. You also have to scrape the sides and bottom of the container to mix thoroughly. After both parts are well stirred, I left the mixture of ArtResin to stand for about 10 minutes in order to release bubbles. The working time of ArtResin before it starts curing is 45 minutes, so I had plenty of time for such leisure. Most of the bubbles have risen to the surface and popped, so hardly any were left. This step might be skipped when pouring thinly, but I just wanted to be safe. To my surprise, I was able to pop the rest of the bubbles just by blowing on the pendant, and I ended up with a crystal-clear fairly hard film. After curing, the tape came off easily from the pendant, and I ended up with a beautiful pear branch floating in the air!


On its own, ArtResin cures into a flexible piece, so one might have to use some sort of a frame in order to create a rigid bead or a pendant. I did a test pour of the resin into a silicone mold, and that’s the pendant I got. It can be useful, since flexible things are more durable, but also might give an unexpected result if one is looking for a rigid cast. It’s not really a problem, but just something to know when planning your project.


ArtResin Review Conclusion
Overall, I’m really pleased with ArtResin. It’s easy to mix, bubbles disappear on their own, and it is UV-stable. Of course, I had to do my own testing, and it has been about three years since my first pour. I can happily confirm that it is in fact non-yellowing compared to many other resins that do not have UV stabilizers and HALS. However, it does react with Titanium Dioxide which is a common pigment in many acrylic paints. I will talk about this in my next article. I hope that this ArtResin review was useful to you, and feel free to ask any questions you might have in the comments.
Leave a Reply